Showing posts with label Product Reviews. Show all posts

Monday, May 6, 2013

Rosewater Cupcakes with Lemon Buttercream, and road testing some Queen Soft Sugar Pearls


      Have you bought your mum a Mother's Day present yet? Or will you be baking her something? How about a  bunch of rose cupcakes for the special person in your life?
       There's something about cupcakes that just make my eyes light up. Dainty little cakes, the perfect size for a little treat. Usually adorned with pretty swirls of frosting and sometimes adorned with pretty little decorations. Unfortunately a lot of cupcakes on offer at shops and cafes are pretty mediocre. Dry, crumbling cake, mass produced, generic taste of premix. Sometimes the frosting is just overly too sweet and not worth eating at all. To be honest, I can't quite remember the last time I've paid for a cupcake. I've always been very wary to try them fearing great disappointment. They're not the cheapest little treats and I expect to get what I pay for. Maybe one day I'll be brave enough to venture out into cup cake world again but for now, I'm happy to bake my own little treats and share them with the people I love.

      Magnolia Bakery is one name that is known all over the world for their cupcakes, they did start the cupcake craze after all and were made famous by Sex and The City. I think they are one of the benchmarks for the best cupcakes. I myself have never personally had a cupcake from Magnolia Bakery but a recipe for their buttery vanilla cupcakes is sufficient enough for me until I eventually step foot in New York (or anywhere near one of their many stores now). I really like making cupcakes with their recipe (with some minor adaptions) so I hope when I finally do visit one of their stores that I am not disappointed.
       I've made rosewater cupcakes with lemon royal icing before but this time I've decided to use the Magnolia recipe as a base for my rosewater cupcakes. And instead of cupcakes I wanted to make baby cakes, a lot of baby cakes. Just adjusted the baking time as the cakes are smaller.


Recipe - Rosewater Cupcakes with Lemon Buttercream
Makes approximately 24 cupcakes (Or in my case, about 84 baby cakes)

Cupcakes
  • 1 1/2 cups self-rising flour
  • 1 1/4 cups all-purpose flour
  • 250g unsalted butter, softened
  • 1 cup sugar
  • 4 large eggs, at room temperature
  • 1 1/4 cups milk
  • 1 tablespoon rosewater
  1. Preheat oven to 170 degrees Celsius. Line your cupcake tins with baking cups.
  2. Sift together the flours and set aside.
  3. Add the rosewater to the milk.
  4. Cream the butter and sugar together until light and fluffy and a pale creamy colour.
  5. Beat the eggs in, one at a time.
  6. Add one third of the flours and beat until combined.
  7. Add one third of the milk and beat until combined.
  8. Repeat 6 and 7 until all the flour and milk is mixed through.
  9. Spoon or pipe the batter into the baking cups.
  10. Bake for about 25-30 minutes or until golden. (For baby cakes reduce baking time to 15 - 20 minutes, until golden).
*The trick to getting nice flat tops on your cupcakes instead of tall domes is to cook at a lower temperature, low and slow. The higher the temperature, the higher your cakes will rise which makes it tricky to frost and decorate. Remember that they will also take less time to bake if you put the temperature up*

Butter cream

  • 250g unsalted butter, softened
  • 250g icing sugar
  • 1/4 cup milk
  • 1 tablespoon lemon juice (add more if needed)
  • Food colouring of your choice
  1. Sift the icing sugar and set aside.
  2. Beat the butter until it is soft and fluffy.
  3. Add about half of the icing sugar and beat until it is combined. Add the rest of the sugar and beat until all the sugar has combined. Keep beating until the butter is very pale in colour and is very soft and fluffy.
  4. Add the milk and beat until combined. Add the lemon juice and beat until combined.
  5. Add your choice of food colouring and beat until there are no streaks left.


      I was recently sent some Queen Soft Sugar Pearls from Beyond the Square Communications to try out and thought that they would be a nice touch for the top of my dainty little rose baby cakes. I normally use cashous (sugar pearls) anyway but find that they are not very pleasant to eat even though they can just add that finishing touch to a cake. I was actually very happy to find out that these ones made by Queen are not hard at all which means that they are not bad for your teeth (and children!). When it says 'soft sugar pearls' they are not actually soft as such but they give way when you bite into them. Not only do these sugar pearls look pretty, they're safe (for your teeth) to eat too. I haven't quite got the famous Magnolia butter cream swirl mastered yet so was happy to pipe pretty little roses for the top of my baby cakes  You just need a star piping tip and a lot of practice to get perfect roses. And I still need lots of practice.

    The Queen Soft Sugar Pearls come in white, rainbow and silver. They should be available at all Woolworths stores now.

      Happy Mother's Day Mumma! Thank you for all the delicious food that you are always serving up to us kids and thank you for instilling the love of food and cooking in me. Have you made any plans to spoil your mum/special motherly figure in your life yet?

Tuesday, January 22, 2013

A Christmas Feast for friends

     If you follow me on instagram you may remember seeing this photo being posted following a big Christmas feast that Ryan and I put on early in December. As January is almost over I thought I better blog about this feast though the minimal photos that I managed to take with my camera are pretty shocking as we were both flat off our feet that day.

      This grand Christmas dinner was a month in the making. As we hadn't caught up with our friends in a long time, we decided that Christmas was a great excuse to invite everyone over for dinner and Ryan and I always love to spoil our friends. As soon as the invitations went out, I went into planning mode and spent the majority of my lunch breaks at the shopping centre near work, looking for inspiration on decorations. I wanted our dinner to have a nice Christmas feel to it but yet be classy and not over the top tacky. Each week I accumulated bags and bags of things I had picked up from the shops, from decorations, to serving tools ,dinner plates and cutlery etc. I also spent a lot of time with my nose in cookbooks and on google putting together ideas for our menu.


      About a week before the event, Ryan and I finalised the menu and wrote out our shopping list and plan of attack.

Our menu was:
Appetisers:
- Prawn Ceviche with Corn Chips and Guacamole
- Truffled Popcorn
Dinner:
- Roast Turkey with Apple and Cranberry Stuffing, White Wine Gravy
- Coleslaw with Buttermilk Dressing
- Baked Sweet Potato with Honey Cinnamon Whipped Butter
Dessert:
- Pumpkin Pie with Vanilla Bean Crème Anglaise and Pecan Praline

      I decided to take the Friday before the dinner off work so that we could head to the markets to get all our fresh produce and start the prep. Unfortunately Ryan was called in to work that afternoon which took a huge chunk out of our planned prep time, which resulted in everything running behind schedule on the day. Very thankful to those friends who showed up early and helped us set up the table and serve up the entrees and drinks.

     During the week before the dinner I started making some goodies for our guests to take home from the dinner. I experimented with a good old trusty shortbread recipe and made these Christmas Pudding cookies, all the flavours of a Christmas pudding but in cookie form. The addition of brown sugar and brandy changed the properties of the shortbread and turned them into cookies, really good cookies.

       I also had some failed mud cake in the freezer so made some choc mud peanut butter cake pops. Woolworths also had massive specials on Lindt and Ferrero's so I grabbed a couple of boxes to fill up some jars to go on the table.

      LOVE peonies so couldn't help grabbing a couple of bunches when I saw them at the markets. I took them to work with me and they lasted for the week.

      We made a cranberry punch (rum optional) and also made some ruby grapefruit soda as we couldn't resist the grapefruits when we tasted them at the markets. There was also plenty of wine to be had as all our guests turned up with a bottle or two of something. I made some bottles of cucumber and minted water but these were left forgotten in the fridge.

      These cute little jars were a last minute decision as I thought our friends would appreciate the hipster factor ;) They were very well received and added to the festive feel of the dinner with a stripped straw and some ribbon tied around.

      Who doesn't love popcorn? We thought it would be a great idea to have tubs of these on the table for our guests to nibble on as they arrived and waited for dinner to be served. Just some plain popcorn drizzled in truffle oil and seasoned with salt.

      I originally wanted to do a modern interpretation of the classic prawn cocktail but Ryan talked me into trying out a prawn ceviche and after a trial run a couple of weeks before hand we absolutely loved it and knew our friends would too.The leftovers we offered to give away disappeared quite quickly which meant we didn't have any for ourselves but it's easily recreated. The recipe for the ceviche can be found here on Gourmet Traveller, we decided to serve some corn chips with it instead of tortillas. For our friends who do not know what a ceviche is, it's a seafood based dish that is served raw and marinated in either lemon or lime juice to 'cook' it.

      Our guests mingling and enjoying their entrees. We had fourteen mouths (and a half) to feed (including Ryan and myself).

      After a successful trial with the Turkey Breast Buffe from Inghams, I was excited to roast up the whole roast turkey for our Christmas dinner but we were worried it wouldn't be enough for fourteen people so thought we should buy a second smaller turkey to supplement. The weekend before, Dad came home with a free turkey from Bing Lee when he went to buy a replacement washing machine. Even though the promotion was for the ovens I guess it pays to have connections ;)

      Ryan is lucky to have two ovens in his house (two kitchens) but one of them was broken so we had to crank up the BBQ and cooked one of the turkeys in there. It was certainly interesting as each one behaved differently and we had to constantly monitor the temperature of the BBQ but we still managed to deliver two perfectly cooked turkeys. They were just simply filled with an apple and cranberry stuffing and then rubbed with butter and seasoned with salt and pepper and basted with pan juices throughout cooking. The stuffing recipe can be found here from Inghams, we replaced the raisins in the recipe for dried cranberries. The leftover stuffing I put into an oven dish and baked separately and served on the side. We served up a white wine gravy made using all the pan juices.

      Didn't have any good photos of the side dishes we served up but they all went down well with our guests and I was happy to see people go back for seconds and even thirds of everything. The honey cinnamon butter for the baked sweet potatoes was just a concoction I made on the day so don't really have an exact recipe. It was just some butter whipped up in a mixer to which I added honey, cinnamon and a pinch of salt to taste. The coleslaw dressing was mayonnaise with buttermilk and mustard mixed in.

      As we were doing a bit of an American themed menu, Ryan wanted to make pumpkin pie for dessert. Instead of whipped cream, Ryan wanted to serve it with a vanilla bean creme anglaise .

      Unfortunately half our guests had to leave before it was served. As Ryan and I were very behind schedule, we had to cook the dessert during dinner and it was quite late by the time it was served. Ryan had managed to make the pumpkin pie filling the day before but we still had to blind bake the pastry and then fill and bake the pie. We also did not have time to make the creme anglaise before hand and had some issues with it going lumpy even though it was all perfect when we did a trial run. The praline almost didn't make it onto the plate but luckily I was able to push through and get it done in time.

      The dinner ended on a high for our guests, a sugar high for some ;). Even though it was a rush to get dessert to the table and it didn't quite turn out the way we wanted as we didn't have time to properly rest everything, everyone loved the flavours of the pumpkin pie. This was the first pumpkin pie for most people and it went down a treat. It's a Curtis Stone recipe we found online, and the creme anglaise recipe is from Taste. We cheated though and used store bought short crust pastry instead, the pampas brand is great! We ended up with a whole pie leftover which I took to work with the creme anglaise (which ended up being velvety smooth after settling overnight in the fridge). Everyone absolutely loved it.

      Even though not everything went to plan and we spent more time in the kitchen than mingling with our friends we can both say it was a successful dinner none the less as we were able to give our friends a good time and share our love for cooking. I don't think we bit off more than we could chew with the menu, if Ryan had not been called in to work we would have gotten a lot more done the day before. A lot of time was also wasted on the day when Ryan had to go to back to work to fetch the pie dishes he had forgotten to bring home. We had quite a lot of turkey leftover in the end but when takeaway was offered, I don't think I heard a single no from anyone ;)

      Perhaps next Christmas dinner we'll just have a pot luck, or dial up some pizzas. But if you know me well, you'll know that I don't like taking short cuts when it comes to food (unless absolutely neccessary) and only serve up the best (and lots of it) no matter if it's made from scratch or store bought. I do live to eat and cook ;)


Thursday, November 22, 2012

A Thanksgiving (or Christmas) Dinner with Inghams Turkey

      Thanksgiving is not really something that we celebrate in Australia though some Christians do celebrate the occasion. The whole turkey Thanksgiving dinner is more of an American influence though us 'Aussies' tend to have our turkey for Christmas instead. The church that my parents attend did happen to have a Thanksgiving service last week with a feast to follow though I don't think there was anyTurkey or roast veggies in sight as it's a Vietnamese church and well, there was lots of Vietnamese food.
      The very first time I tried to cook a turkey it was a disaster. Our oven fan had broken a few days earlier and I was very reluctant to have our gas oven running over such a long period of time without a fan. Ryan and I tried cooking it on a kettle coal BBQ but it just didn't seem to want to cook at all. Mainly because I think both of us were a little clueless as to how to cook a turkey. We ended up slicing up the half cooked turkey and frying it off in a pan. I wouldn't call that one of my successful meals ever though the stuffing we made was pretty good. Luckily the turkey was only complimentary to a big BBQ spread my mum had put on for the family already.
      I didn't think I'd see another turkey again in my life until I received an email inviting me to sample some Turkey products from Ingham. I was definitely keen to give the turkey another go and was sent a Turkey Breast Buffe and a Whole Roast Turkey to try out.


     As it had been a long time since I last cooked a nice meal for my family, I decided that I'd cook a Thanksgiving dinner for my family with the Turkey Breast Buff. I wanted to keep the Whole Roast Turkey to use in a couple of weeks for a big Christmas dinner Ryan and I are hosting in a couple of weeks for some friends.
      Whenever I cook for my family it's usually been a meat and three veg kind of a meal. You might think it weird that such a staple western meal is considered special to us. Well, it is when you have a rotation of different Vietnamese noodle soups, braises, rice, and stews as your staple diet. I should be glad that my parents are willing to eat what I cook up, though I always have to put a bottle of soy sauce and chili sauce on the table for them. Generally my seasoning is ok but they always need their chilli kick from either some chilli paste or fresh chilli. It makes the food easier to digest for them as they are used to either rice or noodles for dinner.


      So about midweek I took the Turkey Buffe out of the freezer to defrost in the fridge. I decided that I was just going to make a nice stuffing and serve a simple gravy for the turkey. For my sides I was going to do my usual roast veggies - potatoes, pumpkin, beans etc.
      The Turkey Buffe comes pre marinated so all you have to do is pat it dry and pop it into the oven and cook according to the instructions on the packet. I did find though that my turkey required longer to cook, all up about 3 - 3.5 hours until it was a nice deep golden brown and the meat had reached the right temperature. I covered it in foil for the first hour and then took the foil off for the remaining cooking time. I also found that the water in the roasting pan evaporated so had to keep topping this up worried that my turkey would be too dry. While waiting for the turkey to cook I prepared all my veggies for roasting.
     An essential tool for roasting meats would be a thermometer, a digital one would give you the most accurate results. I googled temperatures to cook turkey and found that it should be about 77 degrees Celsius in the breast. The trick is to not constantly open the oven to check on the turkey, only often enough to replenish the water in the roasting pan. My turkey turned out perfect! I covered it in foil and let it rest while I popped all my prepared veggies into the oven to cook.

       For my stuffing, I tweaked this stuffing recipe from the Ingham's Turkey website. I didn't have raisins but found sultanas in the fridge but I didn't have enough sultanas either so substituted the remaining quantity for dried cranberries. I also used dried sage leaves as that's what I had on hand. As there was more stuffing than the amount needed for the turkey cavity I pressed the leftover stuffing mix into a baking pan and popped it into the oven with the turkey until it had turned golden brown on top. It had a nice drier texture in contrast to the stuffing that came out of the turkey which was a lot more moist from soaking up the juices. I loved this stuffing recipe, saltiness from the bacon, the sweetness of the fruits, fragrant sage, it went well with the turkey and gravy.

      My rosemary and garlic roasted potatoes are a big hit with the family so I make these for every family dinner I cook for. I tend to measure my ingredients by eye, dried rosemary (you can use fresh rosemary finely chopped), finely diced garlic, cracked black pepper and salt to season and also a small sprinkling of sugar to balance the salt (a very Asian thing to do but it works). Drizzle over some olive oil, toss the potatoes to evenly coat and then I roast them on a rack in the oven at 220 degrees Celsius for about 45-50 minutes.

      I absolutely adore roast pumpkin (though not as much as I adore roast potato). I'd be happy to have a whole bowl as it is. Usually I'd toss the pumpkin pieces in some paprika, cayenne and cinnamon (about 2 teaspoons of each per kilo of pumpkin) with olive oil and salt and pepper before roasting but this time I decided to roast them with maple syrup and cinnamon instead. They were a big hit, especially with Ryan.

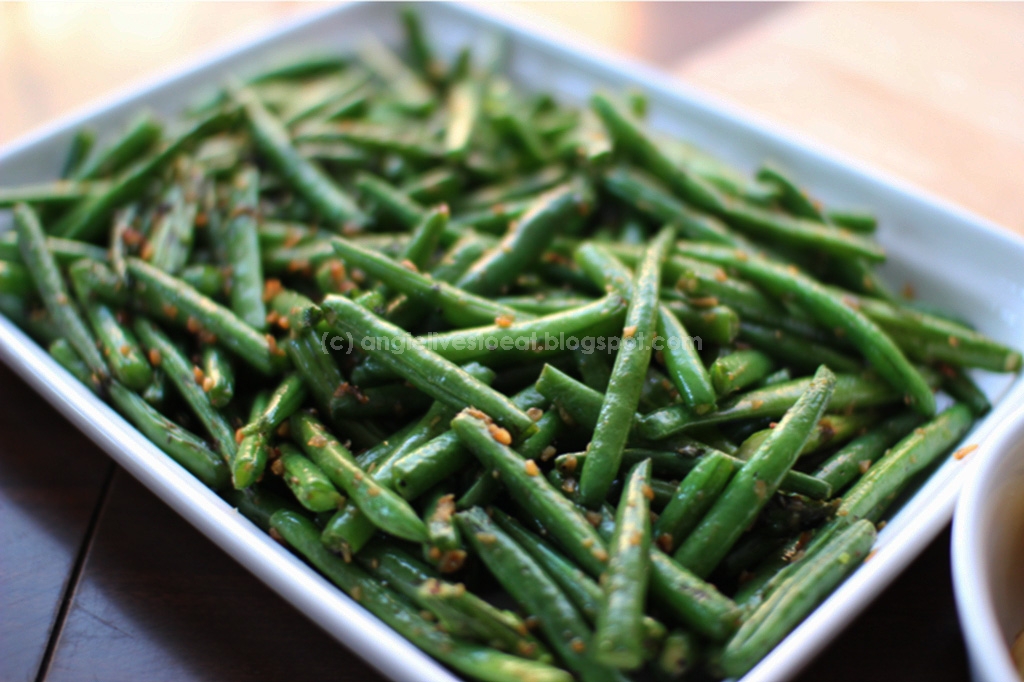
      I believe that there should always be something green and mum had bought some green beans so I sauteed them in some garlic. It's the only way I enjoy my green beans. Mum did complain they were a touch under cooked but Ryan and I loved the crunch they still had. Oh and did I tell you how much I love garlic too?

      I made sure that the roasting pan was topped up with water during cooking so that any drippings from the Turkey wouldn't dry out and burn so I could use it to make a white wine gravy. I used this gravy recipe from the Ingham's Turkey website. It's actually a really great website that they have developed with recipes, how to's and product information on the other turkey products in their range.

      It was not a fancy schmancy dinner but the important thing is that everyone enjoyed it. I was just really happy that I managed to cook the turkey perfectly and that the meat was juicy and tender. As usual, plenty of leftovers which were happily packed for lunch the next day or turned into sandwiches.

Happy Thanksgiving dear readers! Have you had your turkey yet or will you be having a Christmas turkey?

Tuesday, April 26, 2011

Melting Moments with Rhubarb Jam Custard

        Soft crumbly buttery biscuits, that just melt in your mouth. Sandwiched with a sweet, smooth, creamy filling. It's like taking a bite of cloud - if you could indeed do so. This is exactly how it should be if these biscuits are done right. I've made melting moment biscuits a couple of times before but they've always been on the slightly crispy side, which is not what these biscuits are all about. I also sandwiched them with buttercream instead, but I think you can really fill them with whatever you please.
        This time I decided to make a rhubarb jam custard, as I was sent some jams to sample so thought I would use it in place of the stewed rhubarb for the custard as per original recipe. My biscuits turned out a little soft and fragile though, but they were a dream to eat. You just had to make sure you had a plate or your hand to catch the crumbs, so that there is no wastage =).

        I've turned to my favourite cookbook the Women's Weekly 'Cookies' book for these Melting Moment biscuits. These biscuits are so easy to make and don't require many ingredients at all. They are quite fragile so handle with care.  Like all sweet treats packed with butter and sugar, they are meant to be savoured, but it is very hard to stop after one.

Recipe: Melting Moments with Rhubarb Jam Custard
(Adapated from the Women's Weekly 'Cookies - rhubarb custard meting moments recipe)

Biscuits
Ingredients:
• 250g butter, softened
• 1 tsp vanilla extract
• ½ cup icing sugar
• 1 cup custard powder
• 1 cup plain flour

Rhubarb Jam Custard
Ingredients:
• 1 tbsp custard powder
• 1 tbsp caster sugar
• ½ cup milk
• 2-3 tbsp Anathoth Rhubarb & Red Berry Jam
(or use whatever jam you please)


        Preheat oven to 160 degrees celcius/140 degrees for a fan forced oven. Beat the butter, icing sugar, and vanilla extract until pale and fluffy.

        Sift together the custard powder and flour, then mix into the butter in two batches. It is supposed to be a very light wet mixture but should not be sticky, add a light sprinkling of flour if it is too wet, be careful not too add too much or else it will change the texture of the biscuits.

        Roll balls of dough and place on a baking tray. They say to use teaspoon measurements of dough but I do it freehand and mine are probably the size of small walnuts (shell on). Use a fork to flatten slightly and give the biscuits a bit of a ridge in them.

        Bake for approximately 15 minutes (more if you have larger biscuits) and then stand to cool.

        While the biscuits bake, make the custard filling. Combine the milk, custard powder and sugar in a small saucepan and stir over medium heat until thickened. Add the jam and stir until well combined.

        The jam actually turns the custard a disgusting colour so I added some powdered red food colouring to make it look more appetising.

        Once the biscuits are cold, spread or pipe them with the filling and then sandwich together. This is where you will need to handle with care. But if you've got the dough right and baked them perfectly then they probably won't be as fragile as mine were.

        These biscuits really are the ultimate tea time treat. It'll be hard to stop at one. And they will melt in your mouth, true to their name.

        Thanks to Rachel from Beyond the Square Communication for sending me these lovely samples. I love jams, but actually rarely eat them. I think it's because the jars always look so pretty but when it comes to taste and texture, they've always disappointed me. Anathoth Jams have actually been on supermarket shelves for a while now but I've never thought to try them. They have recently launched this new flavour, Rhubarb & Red Berry.
        All I can say is, once I popped the lid off one of these tubs it only took days to empty it, compared to all the jam jars I have bought in the past that sit in the fridge almost full until past their expiry date. It's all natural, made of just fruit and sugar just as they are home made. There are no additives, preservatives, or extra artificial pectin added. You can tell from the way it just falls off your knife, unlike the solid jelly's that some other brands sell. I've promised myself that I'm going to make my own jam one day. Even if I do it just once.

        I originally made some scones to test out my jam samples but decided not to write about them just yet. They didn't turn out as I had imagined them to, and my technique needs some refining. I also need to follow the recipe properly. I'll be making them again soon so keep an eye out. I made some vanilla whipped cream to go with the jam. They were scrumptious little morsels. Not as good as the scones that the sweet old ladies from the Country Women's Association dished out at the Easter Show. But still tasty none the less.

Tuesday, March 22, 2011

Manuka Honey & Pistachio Dukkah Ice Cream

        It's been a long while since I last made home made ice cream. I've actually been sitting on this flavour combination since August last year, after attending an event relaunching the Table of Plenty dukkah range. At the end of our banquet we were served a dessert plate which included a dukkah ice cream which had hints of honey in it. I think it was the most memoreable part of the meal. I knew that it was something I was going to have a go at recreating myself.
        Spring came and went and then Summer just got too hot to churn ice cream using my little machine, the ice bucket just melts before the ice cream even has a chance to churn. But luckily, Autumn is now here and the warm days are turning cooler in the evenings which means I can safely pull out my ice cream machine and start churning again.

        I was given a goodie bag containing some Table of Plenty dukkahs to play with at home. Ryan and I made some dukkah crusted steaks with some and I had been saving this pistachio one to make an ice cream with. If you don't know what dukkah is, it's a mixture of ground nuts, spices and seeds traditionally eaten as a dip with some bread and oils. You can also use it to season proteins before cooking or to mix through salads. I was inspired when I had it in a dessert, ice cream of all things, I just wanted to experiment and make it for myself. It just took me a long time to get organised and do it (and waiting for the weather to cool down slightly too).

        Some liquid gold. This is actually the 1kg jar of Manuka Honey which Ryan and I bought on our trip to New Zealand with my family. I decided that the Manuka honey would give a nice flavour to the ice cream, rather than regular honey. I make up a basic ice cream recipe then add my flavurings, using a few sources for comparison and then making up my own measurements for the ingredients. I'll give you the recipe as I remember it (measurements may be approximations only).

Recipe: Manuka Honey & Pistachio Dukkah Ice Cream
Ingredients
600ml thickened cream
250ml milk
1/4 cup sugar
3 eggs
1/2 cup honey
30g dukkah mix (I used the Pistachio Dukkah by Table of Plenty)

        Whisk the eggs and sugar until pale and creamy and then add the honey and whisk until combined.

        Heat the cream and milk until just simmering (do not boil). Leave to cool for a minute or two. Slowly whisk the milk and cream mixture into the egg mixture and whisk until combined. Pour the mixture back into a clean saucepan and cook over medium heat without boiling until the cream mixture is thick enough to coat the back of a wooden spoon. (When you run your finger through the mixture it should stay seperated). Strain the mixture into a large bowl or container and cool, then store in the fridge overnight.

        Set up your machine as per manufacturer's instructions. Stir your cream mixture and then add it to the machine and churn according to the instructions provided. I own a Krups ice cream machine which comes with a bucket which needs to be pre-frozen 24 - 48 hours before churning the ice cream. I then attach the rings and little electric motor with beater and away she goes.
        The handy thing about living at home and Mum having a large chest freezer is that the tub lives in the freezer until I am ready to make ice cream hence no need for pre-planning. I do need to remember to return the bucket back once it's been cleaned and thawed out.

        Once the mixture is poured into your ice bucket don't wait around taking photos. I learned the hard way that the mixture instantly freezes around the edge and because the motor is only low voltage and the beater is plastic, I have a good old time trying to scrape all the frozen mixture off the sides and bottom so that the beater attachment can churn the cream mixture. It keeps getting caught trying to push through the already frozen mixture stuck to the sides and bottom.

        After a lot of kafuffle the ice cream is churning and we soon see the mixture progress to a nice thick fluffy creamy consistency.

The dukkah is then added and mixed through.

        This is as far as you will get, the ice cream at this stage is more of a soft serve ice cream. Just pop it into the freezer for a bit until it firms up before serving. The ice cream does solidify quite a bit after prolonged storage in the freezer as it doesn't contain as much air and other additives which commercial ice cream contains. Just be patient and leave it out for a couple of minutes to soften before serving. A bit of extra dukkah sprinkled on top before serving is optional.

        And the verdict? Mellow sweetness from the Manuka honey, a bit of crunchy texture from the nuts and seeds, bit of spice which gives the ice cream a very slight savoury undertone, combined with creamy ice cream, it was really lovely to eat. Mum and Dad didn't mind it, Ryan loved it, I thought it was pretty addictive. I'm glad I finally got around to making this flavour, it sure beats all the boring classics on the supermarket shelf ;).